Setup your Git on Mac
In the last tutorial you have learned about how to get the setup done in the windows system, in this tutorial we will help you setup on Mac. This may feel very different from the windows setup, as we use homebrew and more mac terminal command to set it up. Now if you are wondering what is Homebrew, it's a package manager for mac.
Step 1: Installing Git on Mac
https://brew.sh/
There are four ways we can install Github on mac
1. Install Via Homebrew
2. Xcode Approach
3. Binary Installer
4. Building from source
Here in this post, we will be using homebrew to install, Go to the homebrew website, copy the install command, once copied go to the mac terminal copy-paste the code, Mac will ask you to enter the system password, click enter. It may take 2 to 3 minutes to install homebrew
-
Go to the Git Website and click on download for mac button.
https://brew.sh/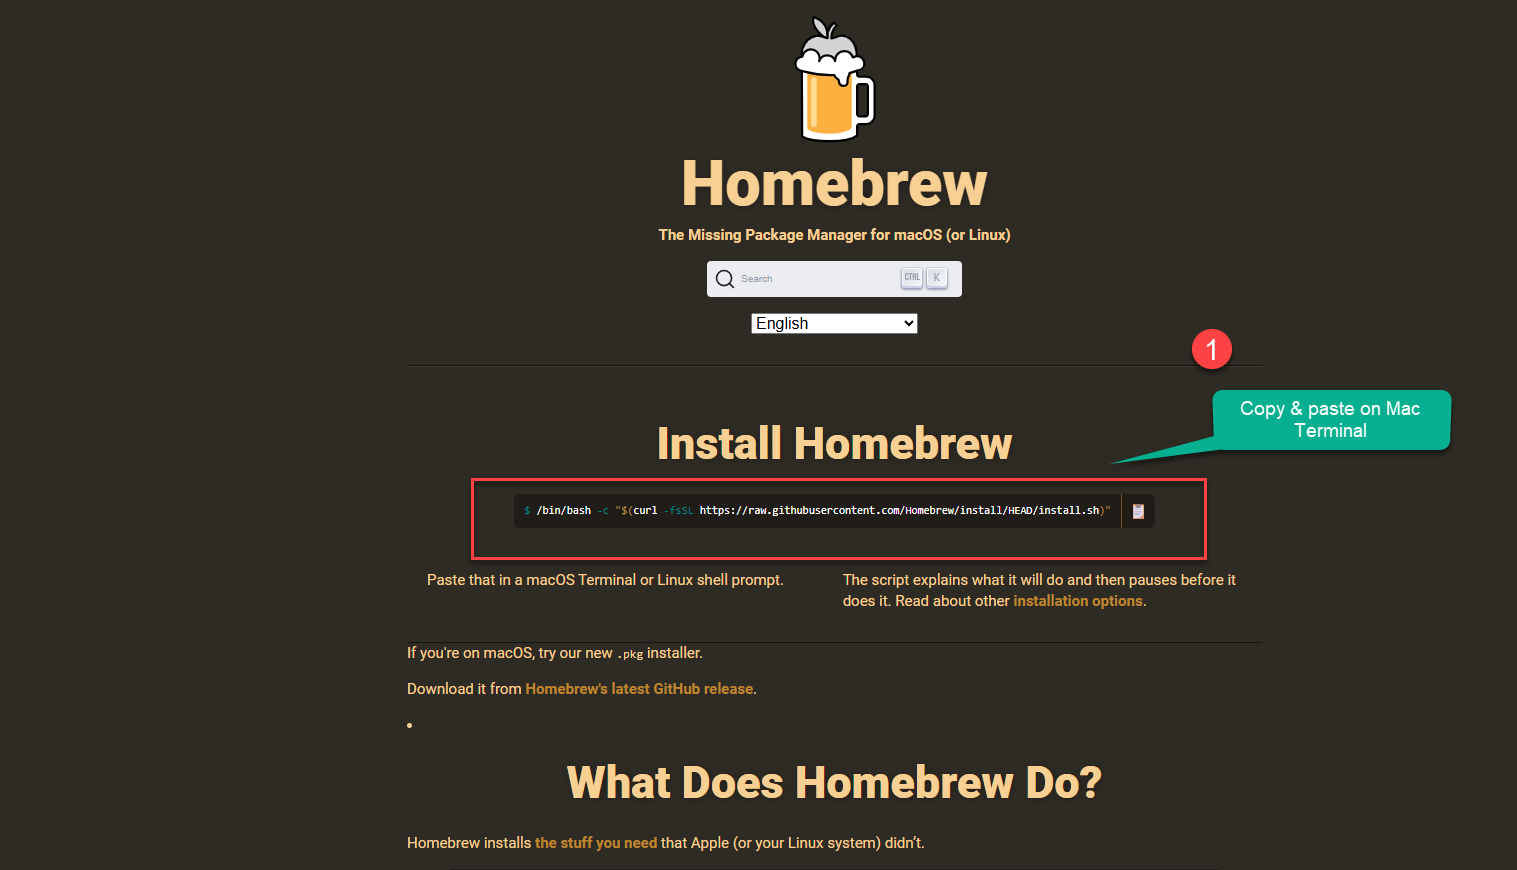
Step 2: Install Git via Homebrew
- Once Installed use the below command to check version of the brew on terminal brew -v
Now you can install git on mac system by entering below command on terminal, In future if you want to update the version of git installed on mac use the "git clone brew upgrade" gitcommand on terminal or git bash.
/bin/bash -c "$(curl -fsSL https://raw.githubusercontent.com/Homebrew/install/HEAD/install.sh)"
brew install git
Step 3: Run the commands in the Mac Terminal
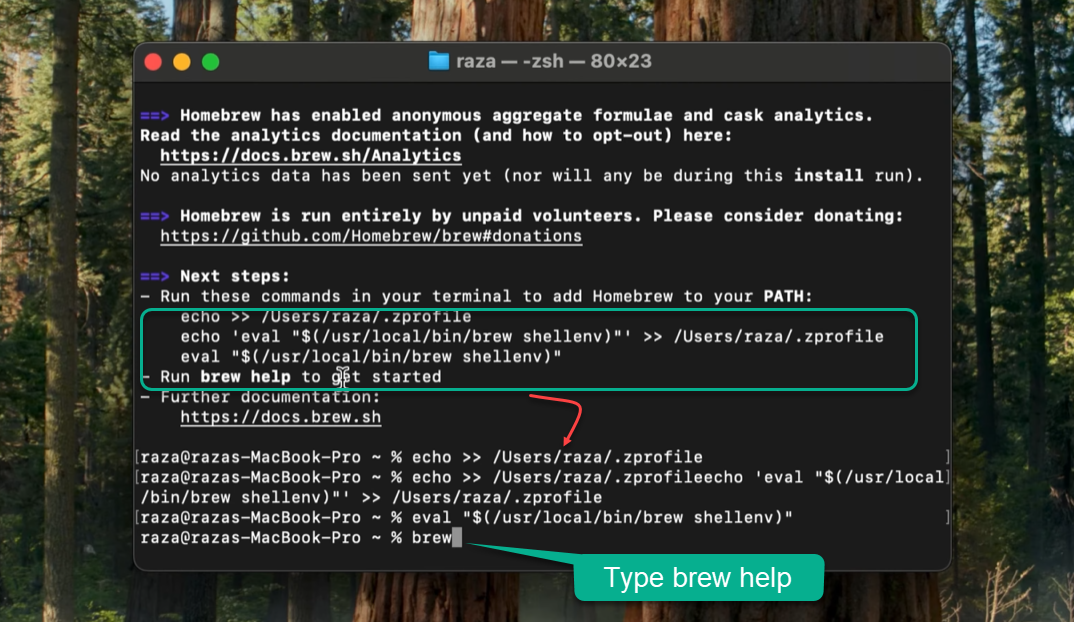
Copy paste the command the terminal shows, one by one on the terminal and press enter to execute it, Once all has been done, enter brew help to see if homebrew has been succesfully installed or not.
Once the setup is completed, open your visual studio code and run the command brew -v or git -v to see whethere the git has been installed or not.
brew -v
Conclusion
In conclusion, I hope you enjoyed reading this article on “Installing Git On Mac?”. In the next post, will be discussing using Git commands and indepth usage on Github. Signing off Sanjay Viswanathan.