First Open Source Project – Making Your First Contribution
Introduction
Welcome to your first open source contribution! In this tutorial, you will learn how to contribute to an open source project directly through GitHub's web interface—no command line required! This is perfect for beginners who want to start contributing to open source projects.
What is Open Source?
Open source software is code that is freely available for anyone to view, use, modify and distribute. Contributing to open source projects helps you:
- Learn from real-world code
- Build your portfolio
- Connect with the developer community
- Improve your coding skills
- Give back to projects you use
Prerequisites
Before starting, make sure you have:
- A GitHub account (create one at github.com)
- Basic understanding of Git and GitHub concepts.
- Willingness to learn and contribute!
The Contribution Workflow
The typical open source contribution workflow involves:
- Fork the repository
- Edit the files
- Commit your changes
- Create a pull request
- Wait for review and feedback
Let's walk through each step!
Step 1: Find the Repository
Navigate to the practice repository: https://github.com/sanjay-kv/Open-source-Practice
This is a beginner-friendly repository designed for practicing open source contributions.
Take a moment to:
- Read the README file to understand the project
- Check if there are contribution guidelines (CONTRIBUTING.md)
- Look at existing issues or pull requests
- Understand what kind of contributions are welcomed
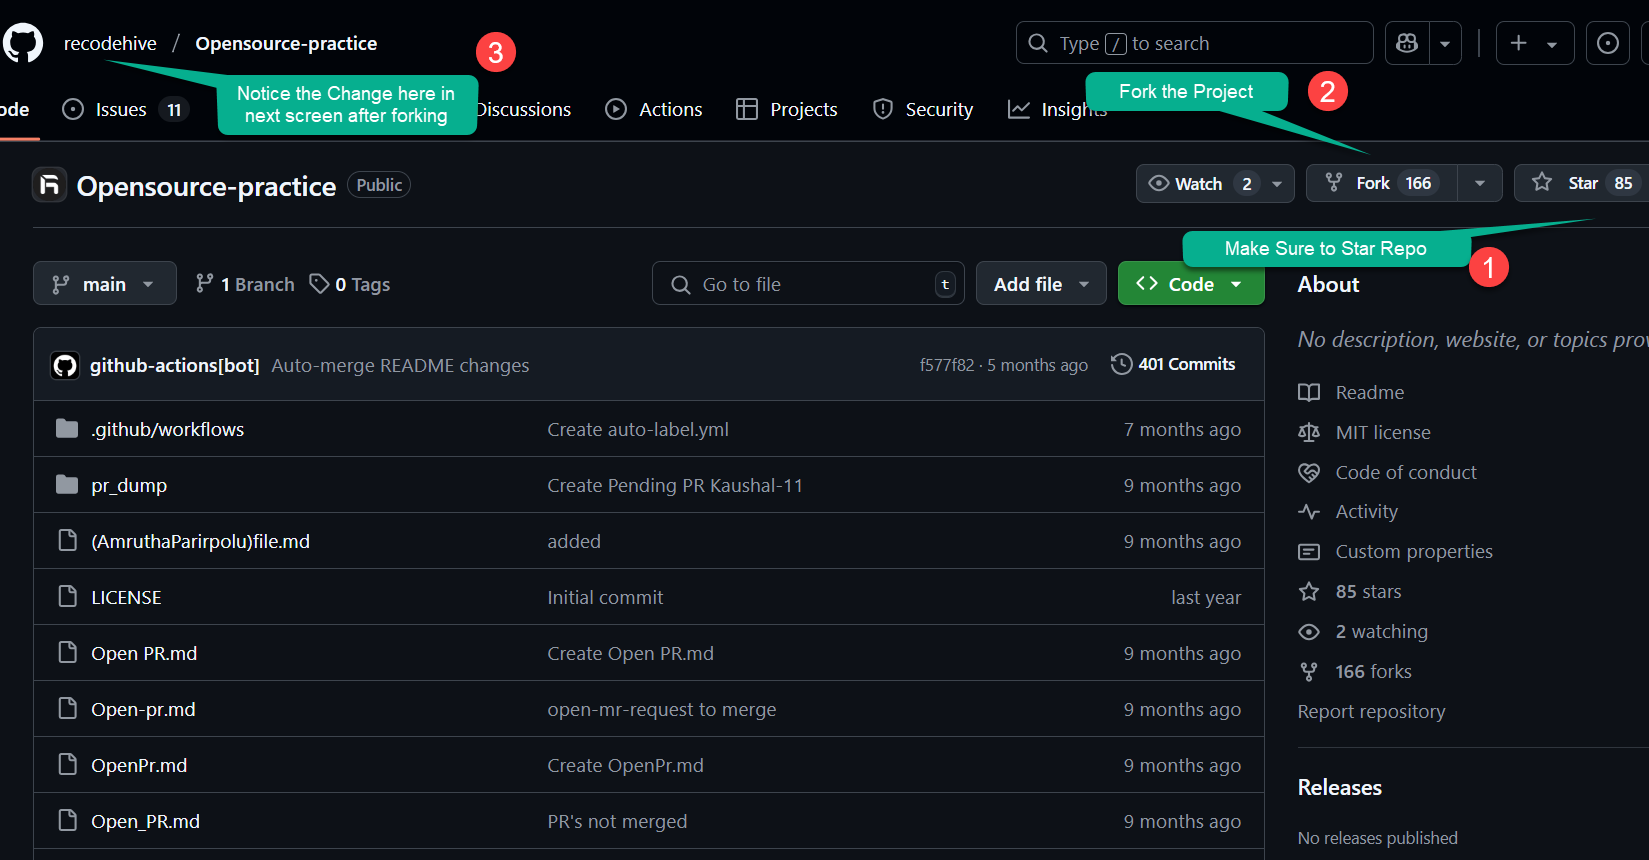
Step 2: Fork the Repository
Forking creates your own copy of the repository where you can make changes without affecting the original project.
- Click the Fork button in the top-right corner of the repository page
- Select your account as the destination
- Wait for GitHub to create your fork
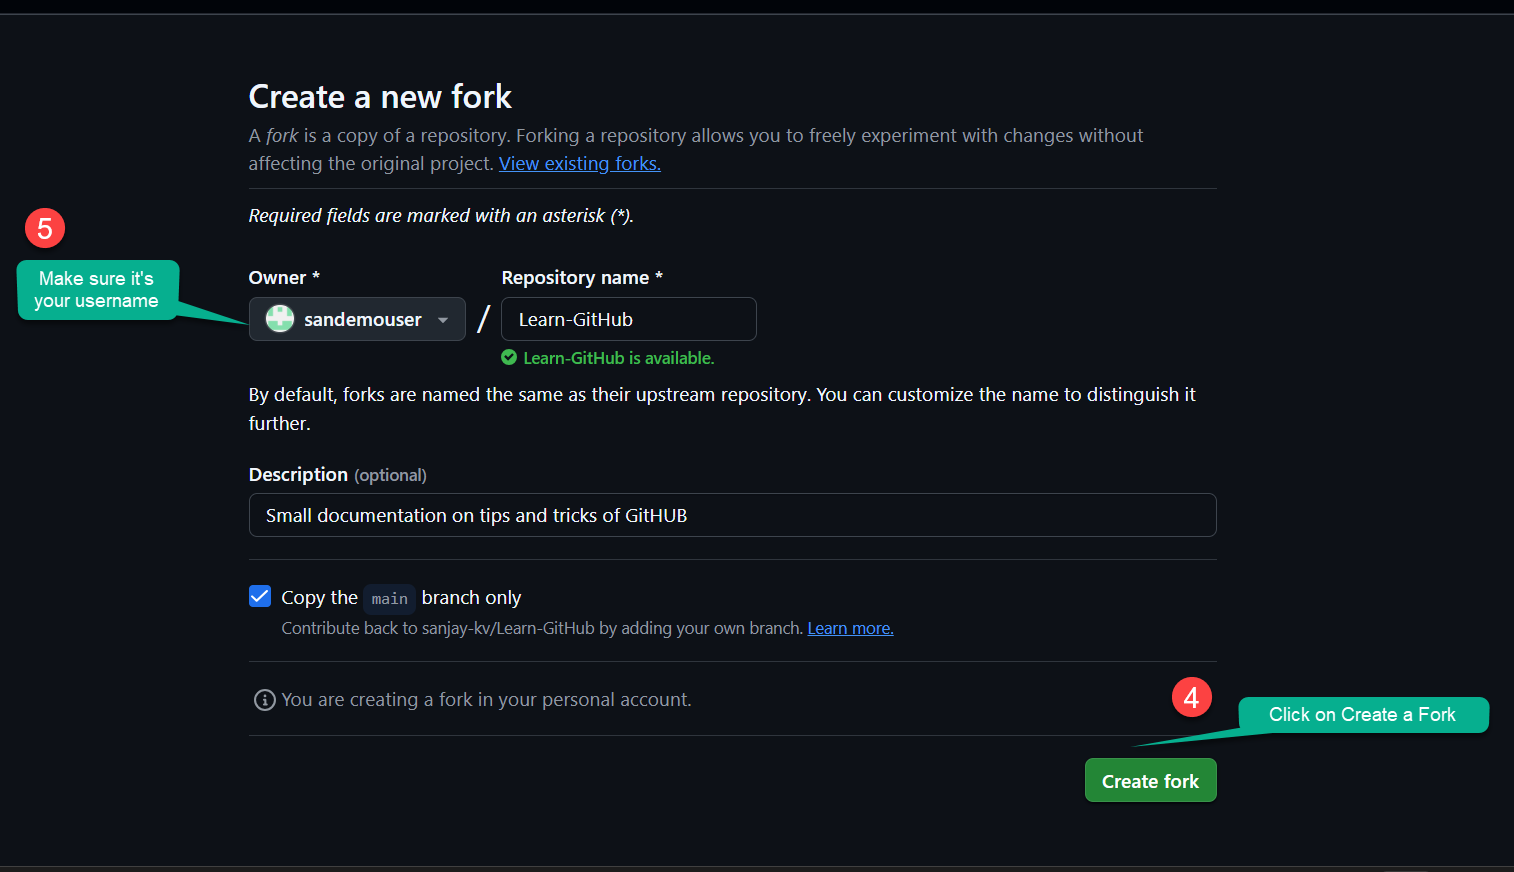
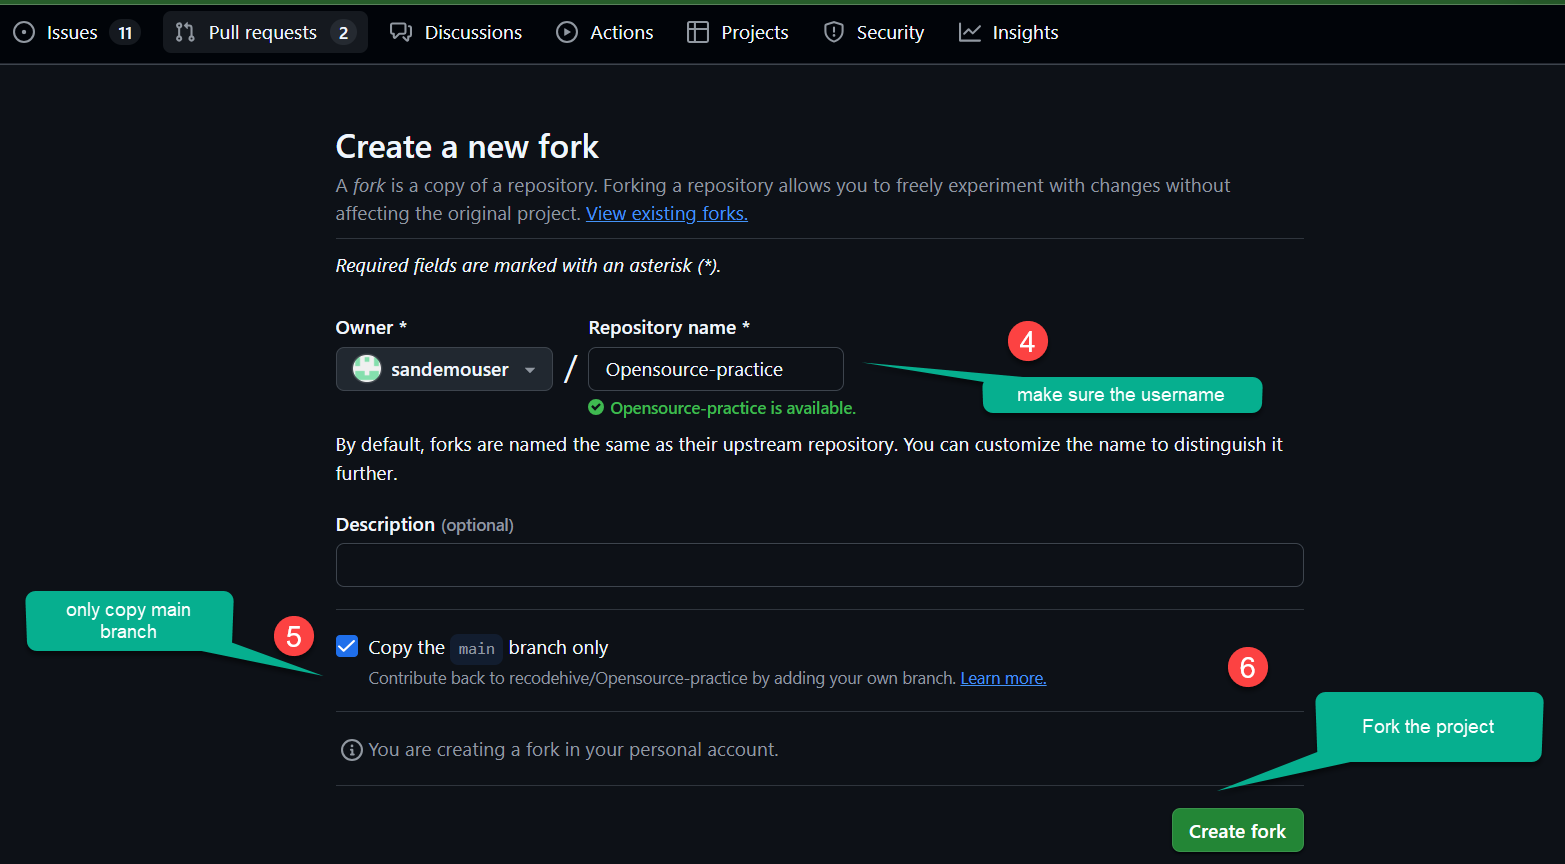
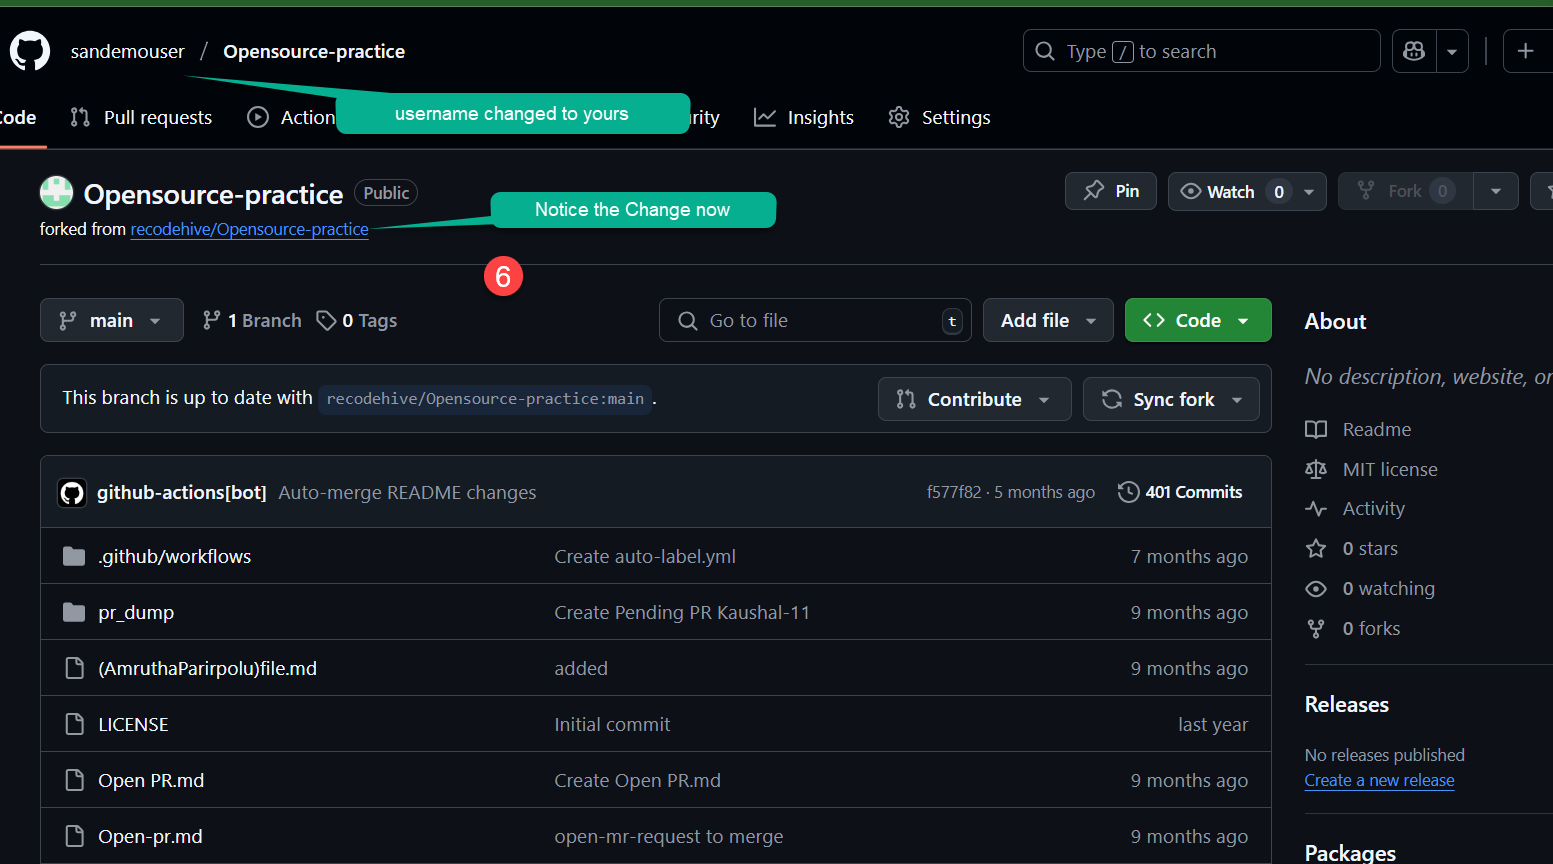
Once the fork is complete, you'll see:
- Your username in the repository name
- A note saying "forked from [original-repo]"
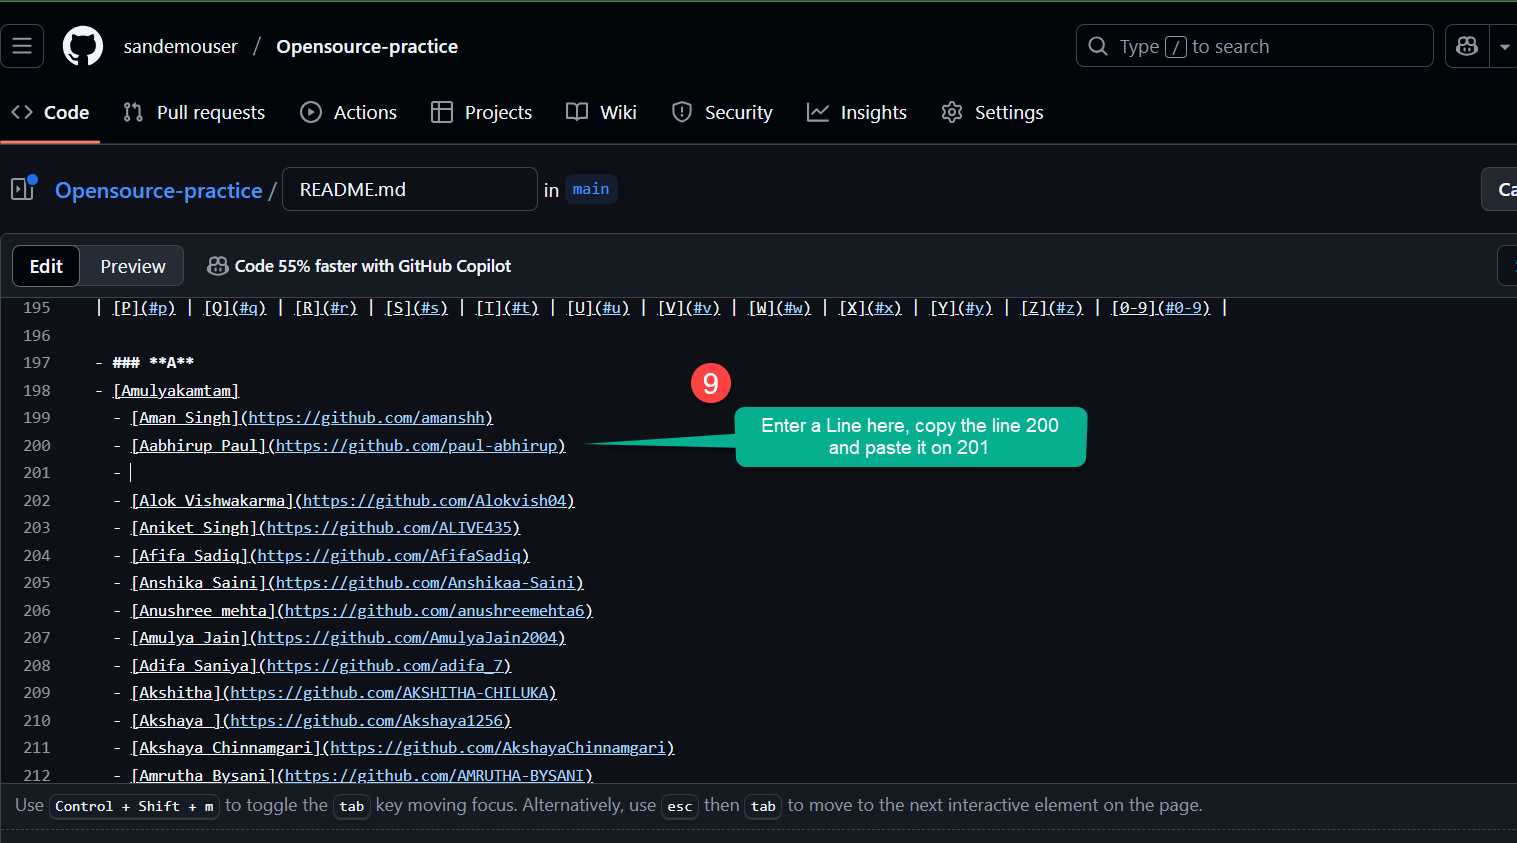
Step 3: Edit files directly on GitHub
One of the great features of GitHub is the ability to edit files directly in your browser without cloning the repository to your computer.
Finding the File to Edit
- Navigate to the file you want to edit (usually specified in the project's README)
- Click on the file name to view it
- Click the pencil icon (✏️) in the top-right corner to edit
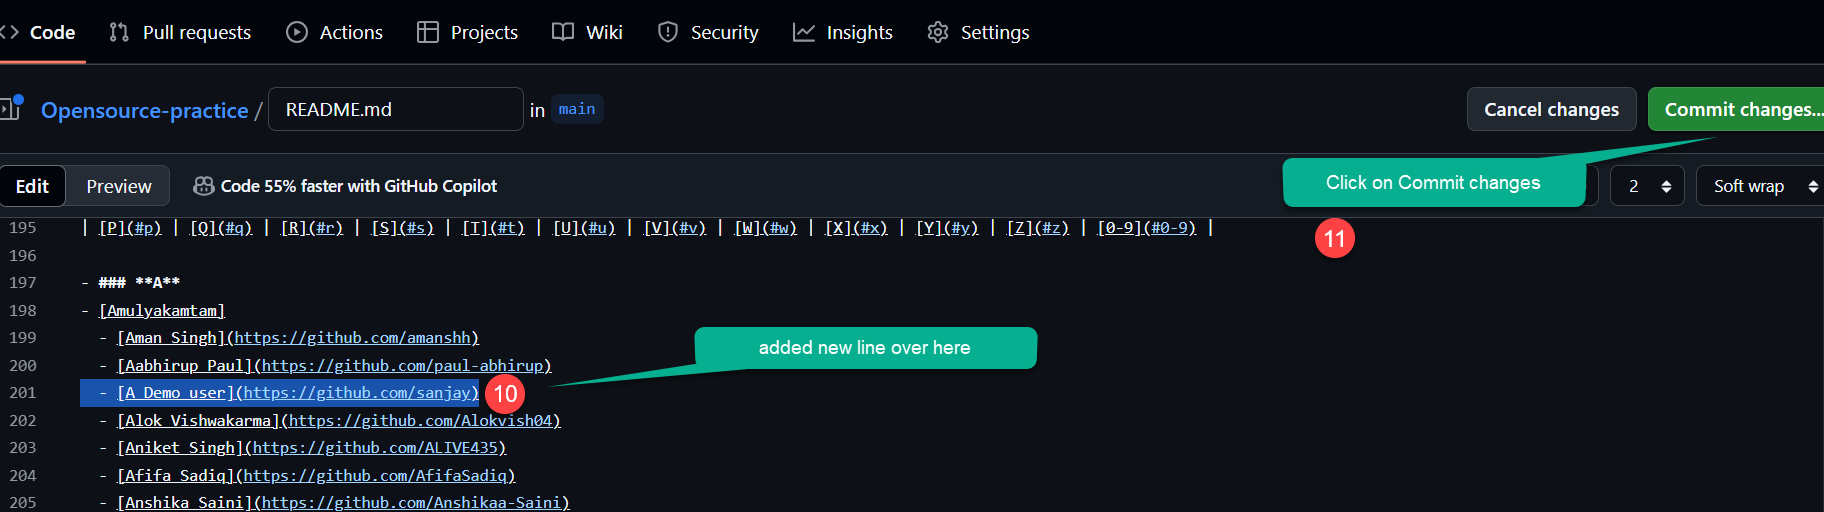
Making Your Changes
For this practice repository, you'll typically add your name to a contributors list:

Common first contributions include:
- Adding your name to a contributors list
- Fixing a typo in documentation
- Updating outdated information
- Adding a translation
- Improving README formatting
- Keep changes small and focused - Don't try to fix multiple things at once
- Follow the project's style - Match the formatting and conventions used
- Test your changes - Make sure links work and formatting is correct
- Read contribution guidelines - Many projects have specific requirements
- Be respectful - Remember real people maintain these projects
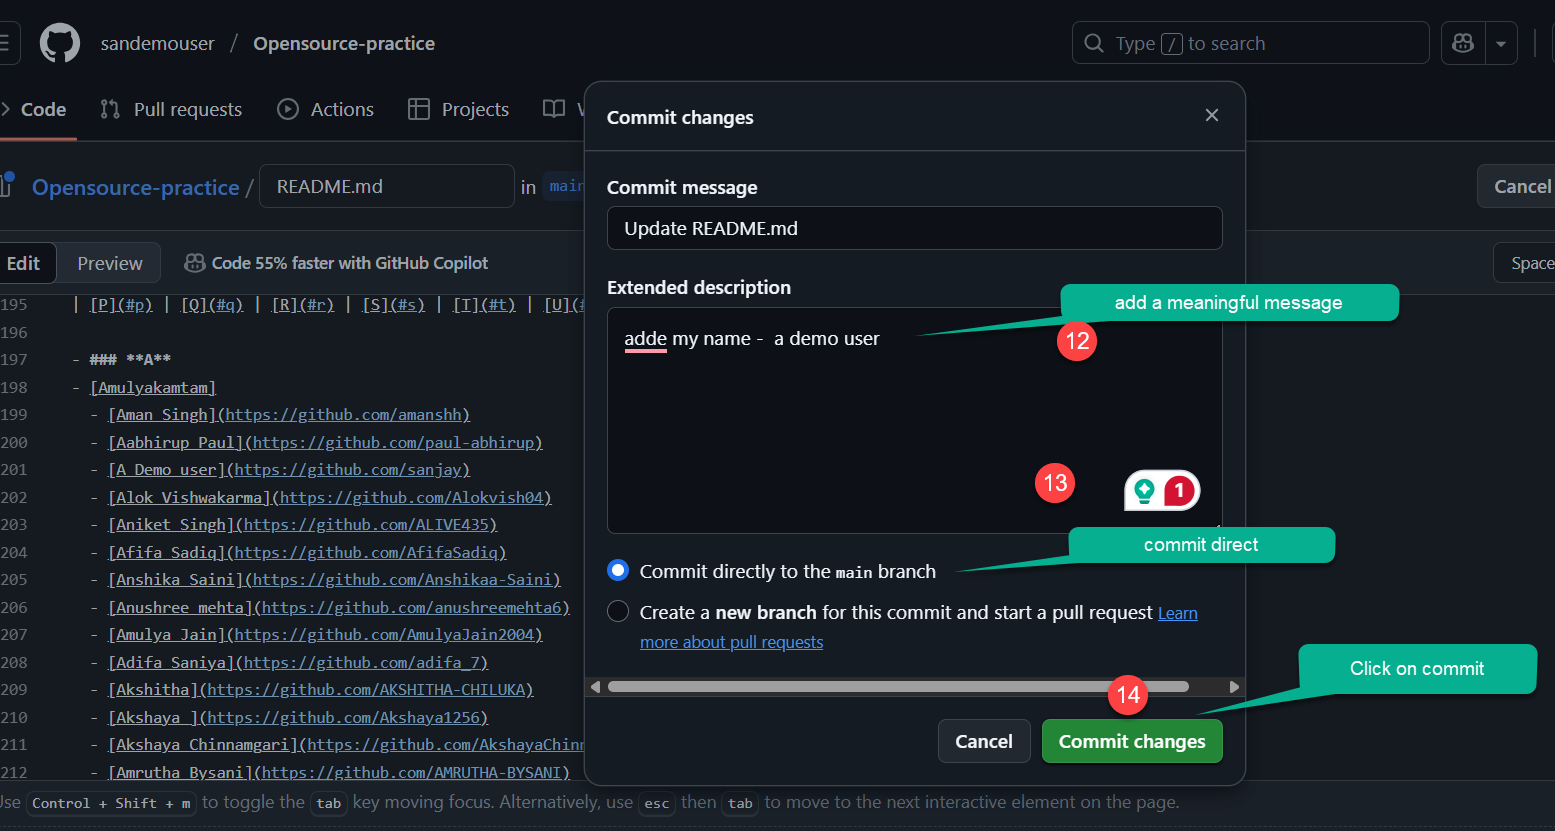
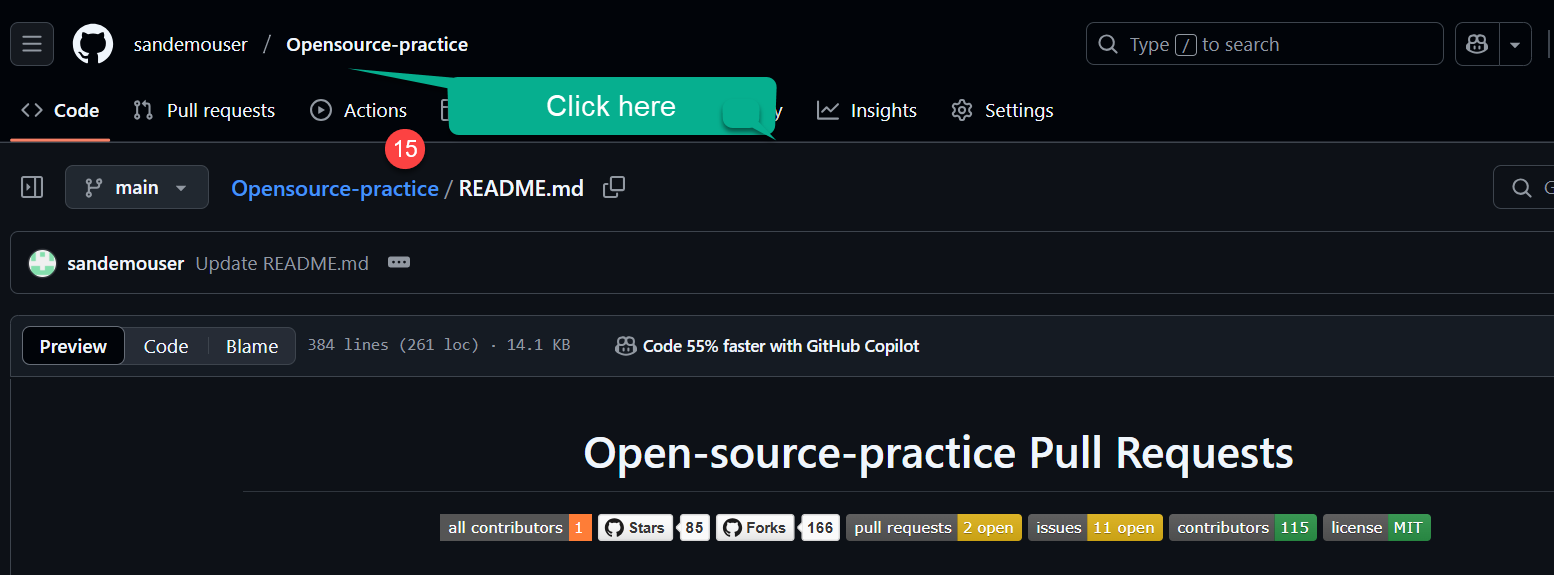
Step 4: Commit your changes
After making your edits, you need to commit them. A commit is like saving a snapshot of your changes with a description.
Writing a good commit message
- Scroll down to the "Commit changes" section
- Write a clear, concise commit message describing what you changed
- Optionally add a longer description if needed
- Select "Commit directly to the main branch" for simple changes
- Click Commit changes
Good commit message examples:
- ✅ "Add John Doe to contributors list"
- ✅ "Fix typo in installation instructions"
- ✅ "Update Python version requirement"
Poor commit message examples:
- ❌ "Update"
- ❌ "Changes"
- ❌ "asdfasdf"
Step 5: Create a Pull Request
Now that you've made changes in your fork, it's time to propose those changes to the original repository through a Pull Request (PR).
What is a Pull Request?
A Pull Request is a way to propose changes to a repository. It allows:
- Project maintainers to review your changes
- Discussion about the proposed modifications
- Automated tests to run on your code
- Iterative improvements before merging
Steps to Create a Pull Request
- Navigate to the original repository (not your fork)
- Click on the Pull Requests tab
- Click the green New pull request button
- Click Compare across forks
- Select your fork and branch from the dropdowns
- Base repository: The original project
- Head repository: Your fork
- Base branch: Usually
mainormaster - Compare branch: Your branch with changes
- Review the changes shown in the diff
- Click Create pull request
- Add a descriptive title and detailed description
- Click Create pull request again to submit
Writing a Good Pull Request Description
Your PR description should include:
- What changes you made
- Why you made them
- How to test the changes (if applicable)
- Screenshots (if it's a visual change)
- Related issues (if fixing a bug or implementing a feature)
Example PR description:
## Description
Added my name to the contributors list as per the contribution guidelines.

## Changes Made
- Added "John Doe" to CONTRIBUTORS.md
- Maintained alphabetical ordering

## Checklist
- [x] Followed the project's style guidelines
- [x] Checked for typos
- [x] Read the contribution guidelines
Understanding "Compare Across Forks"
The Compare across forks feature is crucial for creating pull requests from your fork to the original repository.
What Does It Do?
This feature allows you to compare changes between:
- Your forked repository (where you made changes)
- The original repository (where you want to contribute)
Why Is It Important?
The comparison view shows:
- All commits you've made since forking
- File changes in a diff format
- Additions highlighted in green
- Deletions highlighted in red
- Conflict warnings if there are any
How to Use It Effectively
-
Select the correct branches:
- Base: Original repository's main branch
- Compare: Your fork's branch with changes
-
Review the diff carefully:
- Ensure only intended changes are included
- Check for accidental modifications
- Verify formatting is correct
-
Look for conflicts:
- Red warnings indicate merge conflicts
- Update your fork if needed
- Resolve conflicts before creating PR
Benefits of Comparing
- Prevents mistakes - Catch unintended changes early
- Improves quality - Review your work before submission
- Reduces conflicts - Identify issues before they become problems
- Saves time - Avoid back-and-forth with maintainers
- Shows professionalism - Demonstrates attention to detail
- Always check the diff before creating a PR
- Make sure you're comparing the right branches
- If you see unexpected changes, fix them before submitting
- Keep your fork updated to avoid conflicts
Step 6: Wait for Review�
After creating your pull request:
- Wait patiently - Maintainers review PRs on their schedule
- Respond to feedback - Be open to suggestions and changes
- Make requested changes - Update your PR based on feedback
- Stay professional - Be courteous and respectful
Watch This Video Tutorial
For a visual walkthrough of the entire process, watch this helpful video:
Finding Projects to Contribute To
Beginner-Friendly Resources
- Good First Issue labels on GitHub
- First Timers Only
- Up For Grabs
- Good First Issues
- CodeTriage
Types of Contributions
You don't have to write code to contribute:
- 📝 Documentation - Fix typos, improve clarity, add examples
- 🌐 Translation - Translate docs or UI to other languages
- 🐛 Bug Reports - Report issues you encounter
- 💡 Feature Suggestions - Propose new features
- 🎨 Design - Improve UI/UX
- ✅ Testing - Test new features and report results
- 📊 Data - Add datasets or examples
- ❓ Support - Help answer questions in issues
Conclusion
Congratulations! You've learned how to make your first open source contribution using only GitHub's web interface. You now know how to:
- ✅ Fork a repository
- ✅ Edit files directly on GitHub
- ✅ Commit changes with meaningful messages
- ✅ Compare changes across forks
- ✅ Create pull requests