Create GitHub Repo (GUI)
In the previous post, we learned about commit, fork and clone. In this post, we are going to take a deep dive into the terminology by creating a GitHub Repository from scratch. To create and host a project, the repository is a place where you add all your program code files and other documentation.
Prerequisites
-
- You must have a GitHub account.
-
- You must also have a basic understanding of how Git works and ensure Git is installed and running on your operating system.
How to create Github Repository
Step 1: Go to the GitHub website. By default, you will be on the Home page as shown below. Click on the + icon in the top-right corner, and from the dropdown, select New Repository.

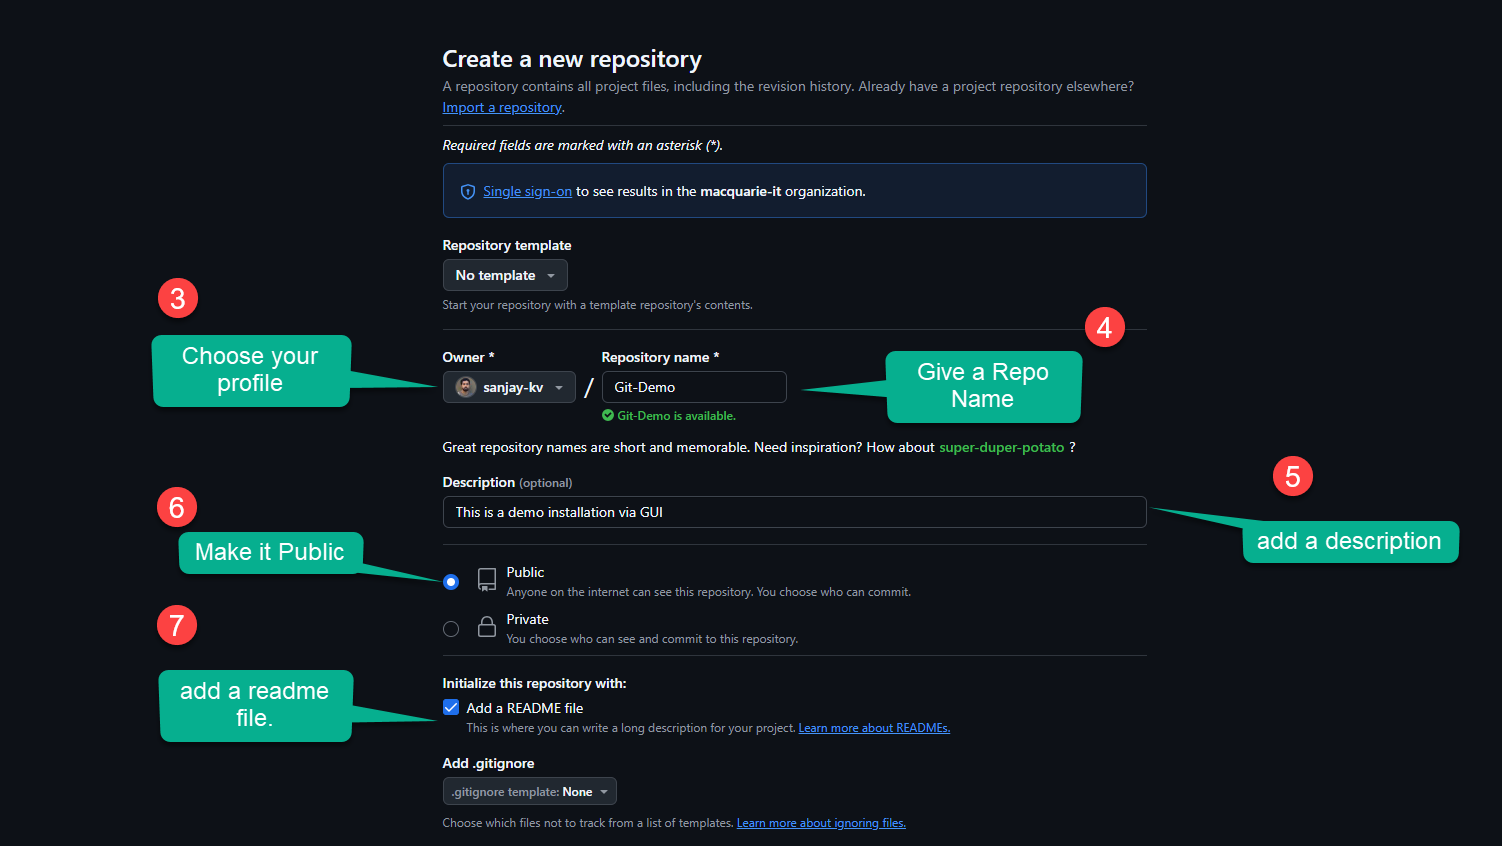
Step 2: Specify the name of the project and choose whether to make it public or private. For this tutorial, we’ll make it public.
Once a repository is made private, the project admin must manually grant permission to other GitHub users to collaborate or view it. This is a common practice at the organizational level.
Next, check the box to include a README file—this will automatically create a README.md file along with the repository. Finally, click on Create repository at the bottom.
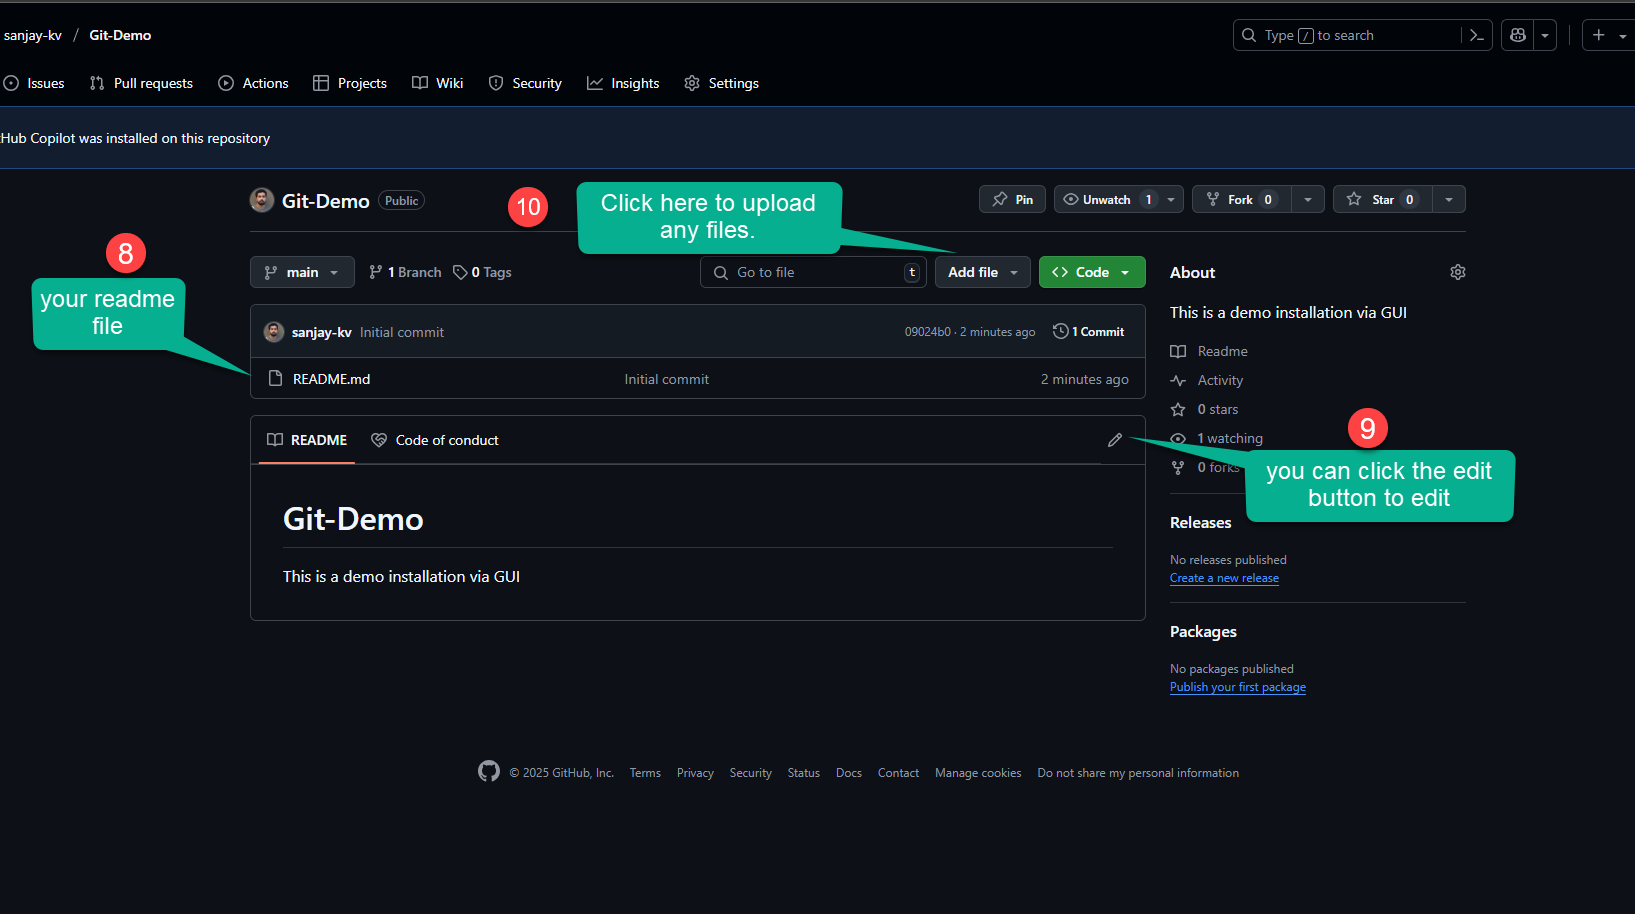
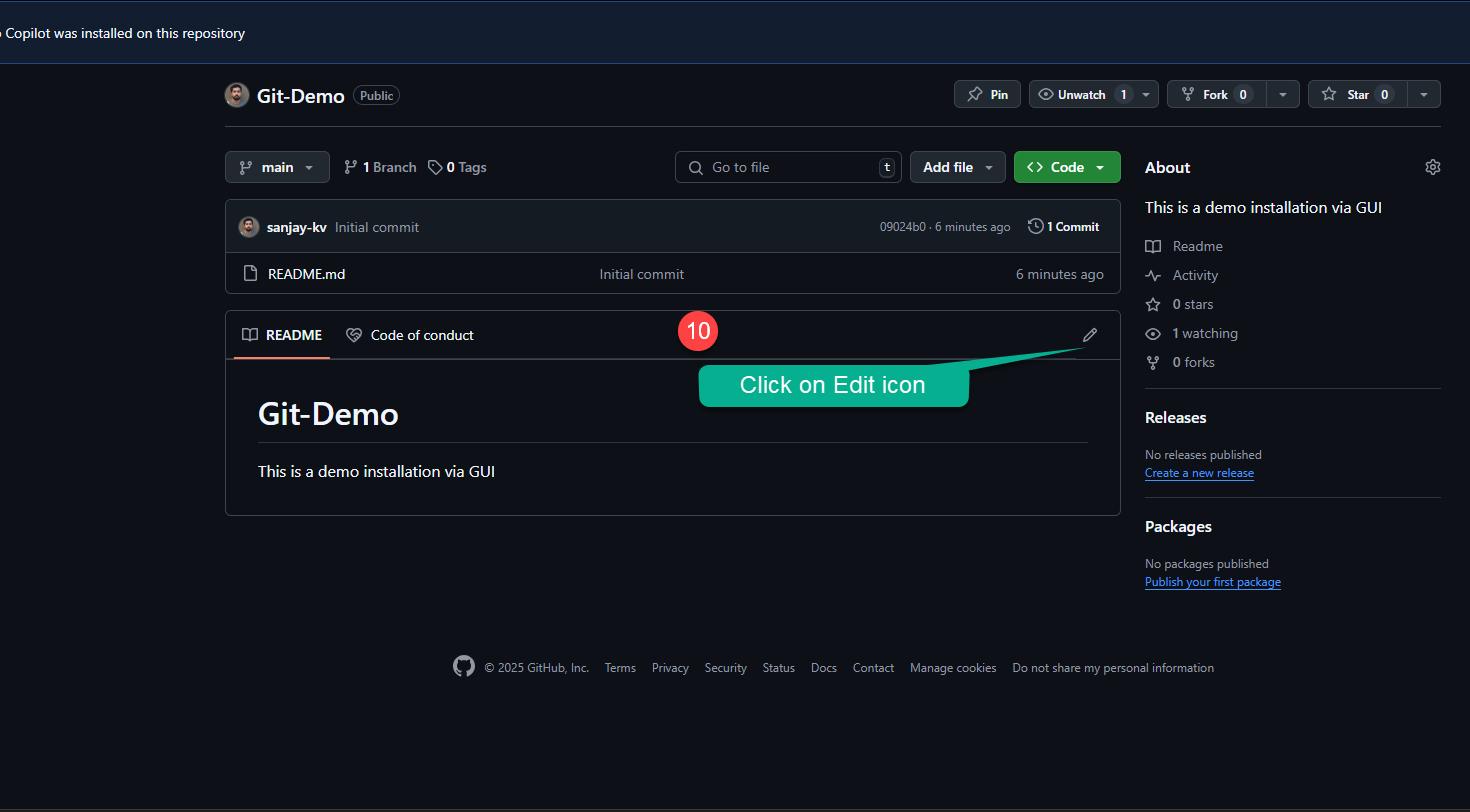
Once the repository is created, you’ll see a screen like the one below. The explanation of each elements is mentioned below.
<!DOCTYPE html>: Declares the document type and version of HTML.<html>: Root element that contains all other elements.<head>: Contains metadata about the document. It includes elements like<meta>and<title>.<meta charset="UTF-8" />: Specifies the character encoding of the document.<meta name="viewport" content="width=device-width, initial-scale=1.0" />: Sets the viewport properties for responsive design.<title>: Sets the title of the document (displayed in the browser tab).<body>: Contains the visible content of the document.<!-- Your content goes here -->: Represents a comment that is not displayed in the browser.
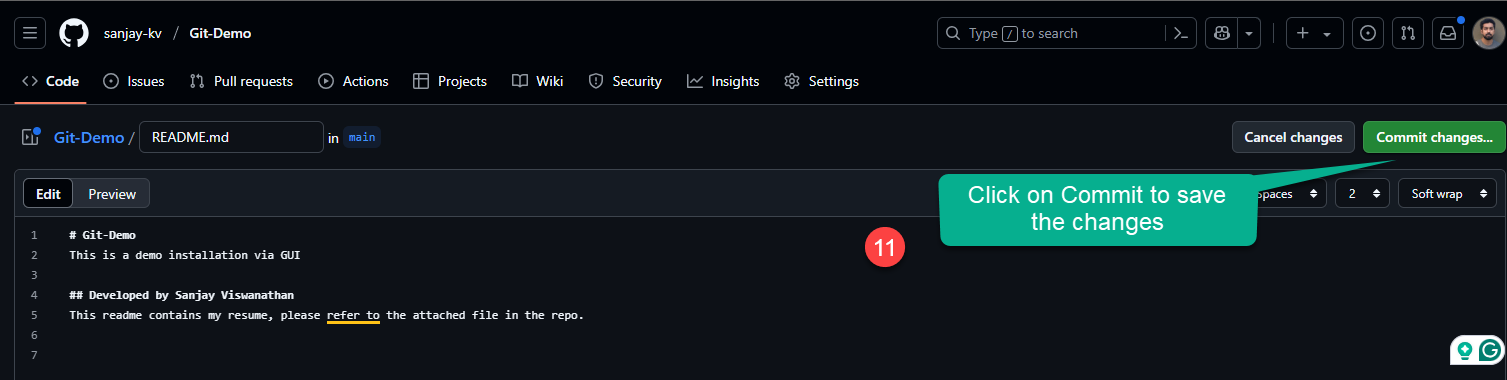
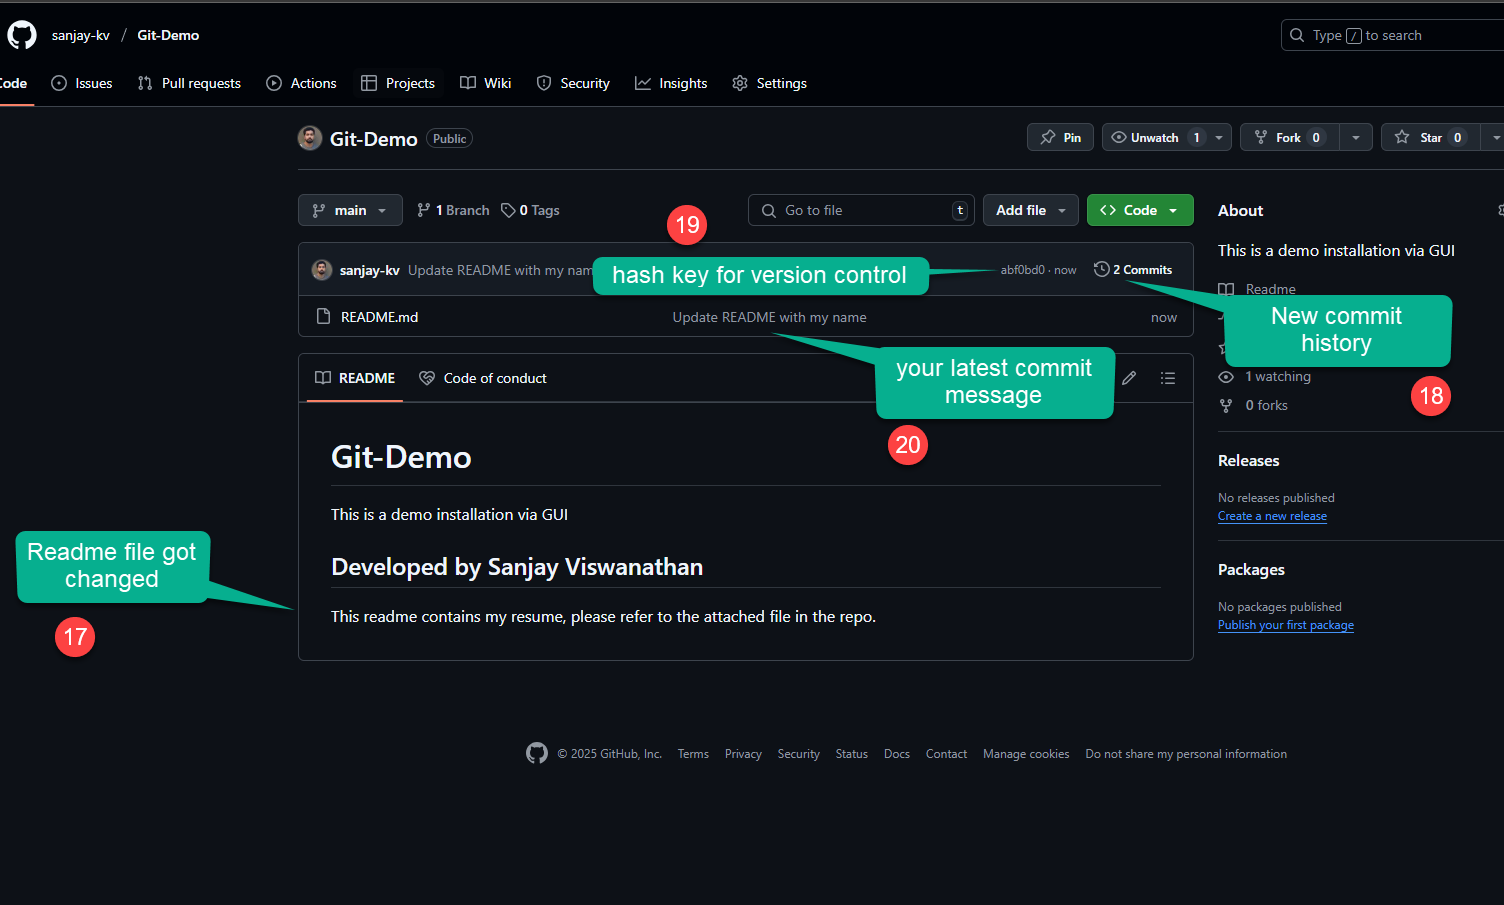
Changing the README and adding more files.
I’m going to add my resume and include my name as a heading in the README.md file.
Adding Markdown Language
Below is a visual representation of a basic HTML document structure:
# Git-Demo
This is a demo installation via GUI

## Developed by Sanjay Viswanathan
This readme contains my resume, please refer to the attached file in the repo.
Browser Rendering
When the above HTML code is rendered in a browser, it will display the following output:
Git-Demo
This is a demo installation via GUI
Developed by Sanjay Viswanathan
This readme contains my resume, please refer to the attached file in the repo.
Explanation
<!DOCTYPE html>: Declares the document type and version of HTML.<html>: Root element that contains all other elements.<head>: Contains metadata about the document.<title>: Sets the title of the document (displayed in the browser tab).<meta>: Provides character set and viewport information.<body>: Contains the visible content of the document.<h1>: Heading element with the text "Hello, World!".<p>: Paragraph element with the text "Welcome to HTML learning.".
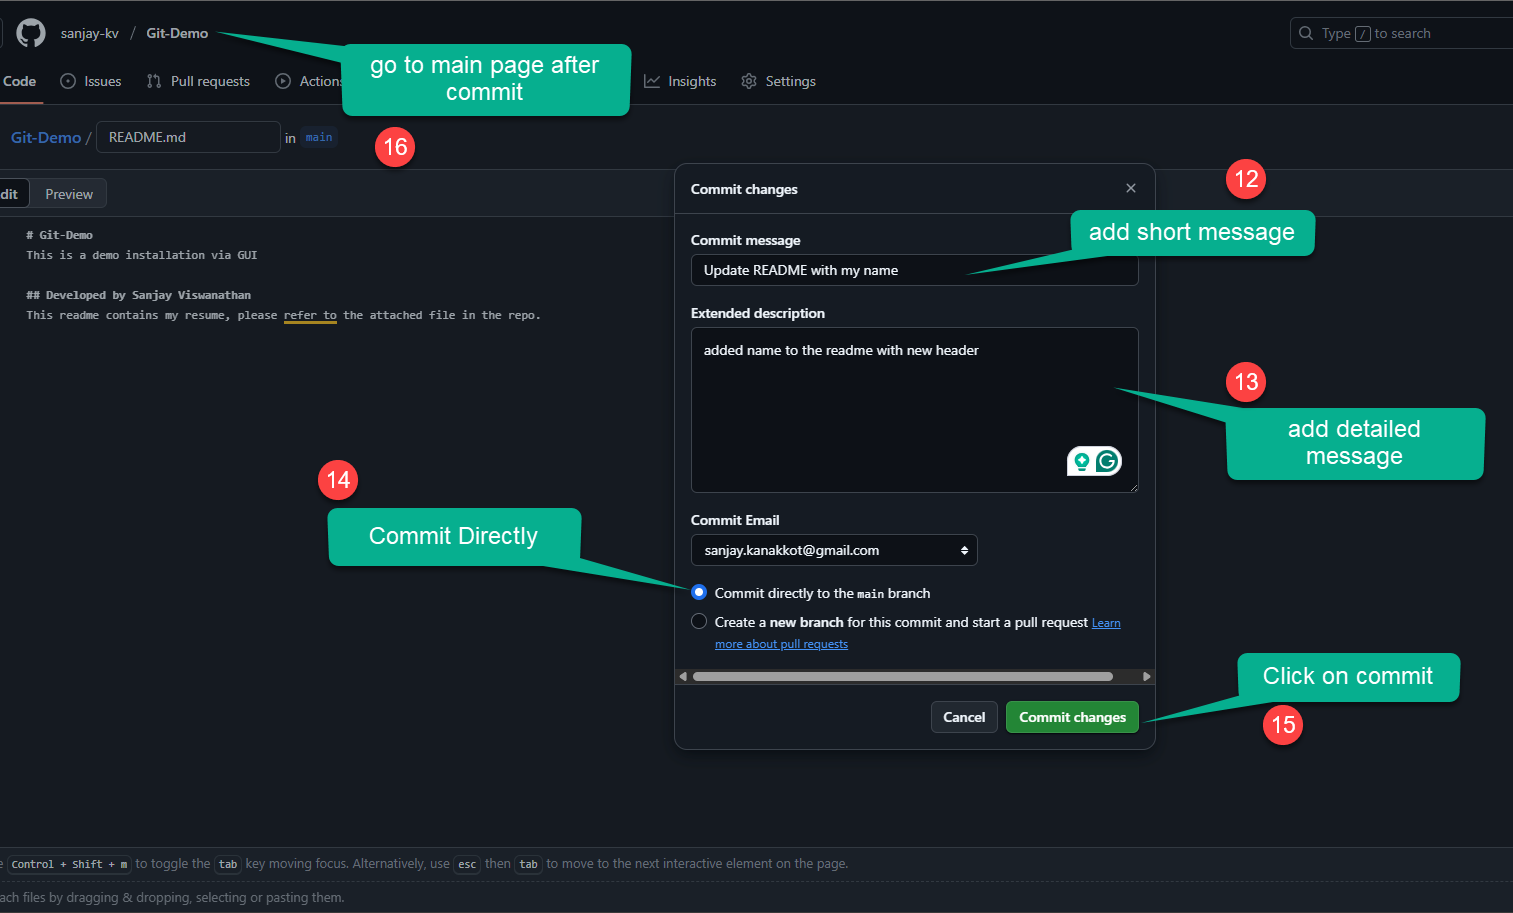
Committing the changes.
I'm going to add my resume and include my name as heading to the README.md file.
This is the step where you need to add additional comments.
https://github.com/sanjay-kv/Git-Demo
Now let's upload your resume
I'm going to add my resume and include my name as heading to the README.md file.
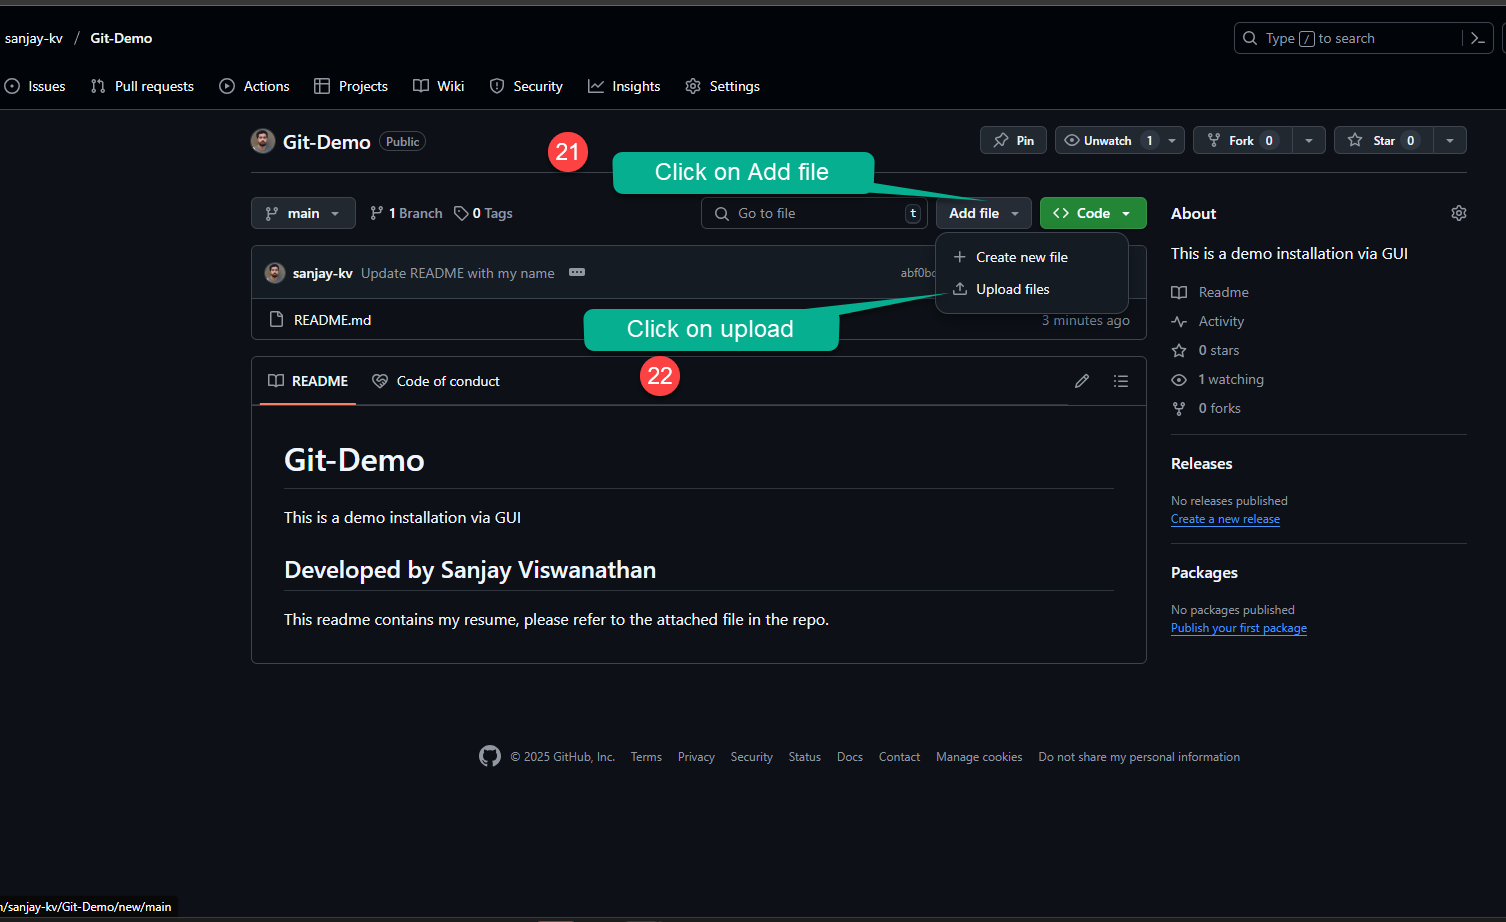
This is the step where you need to add additional comments.
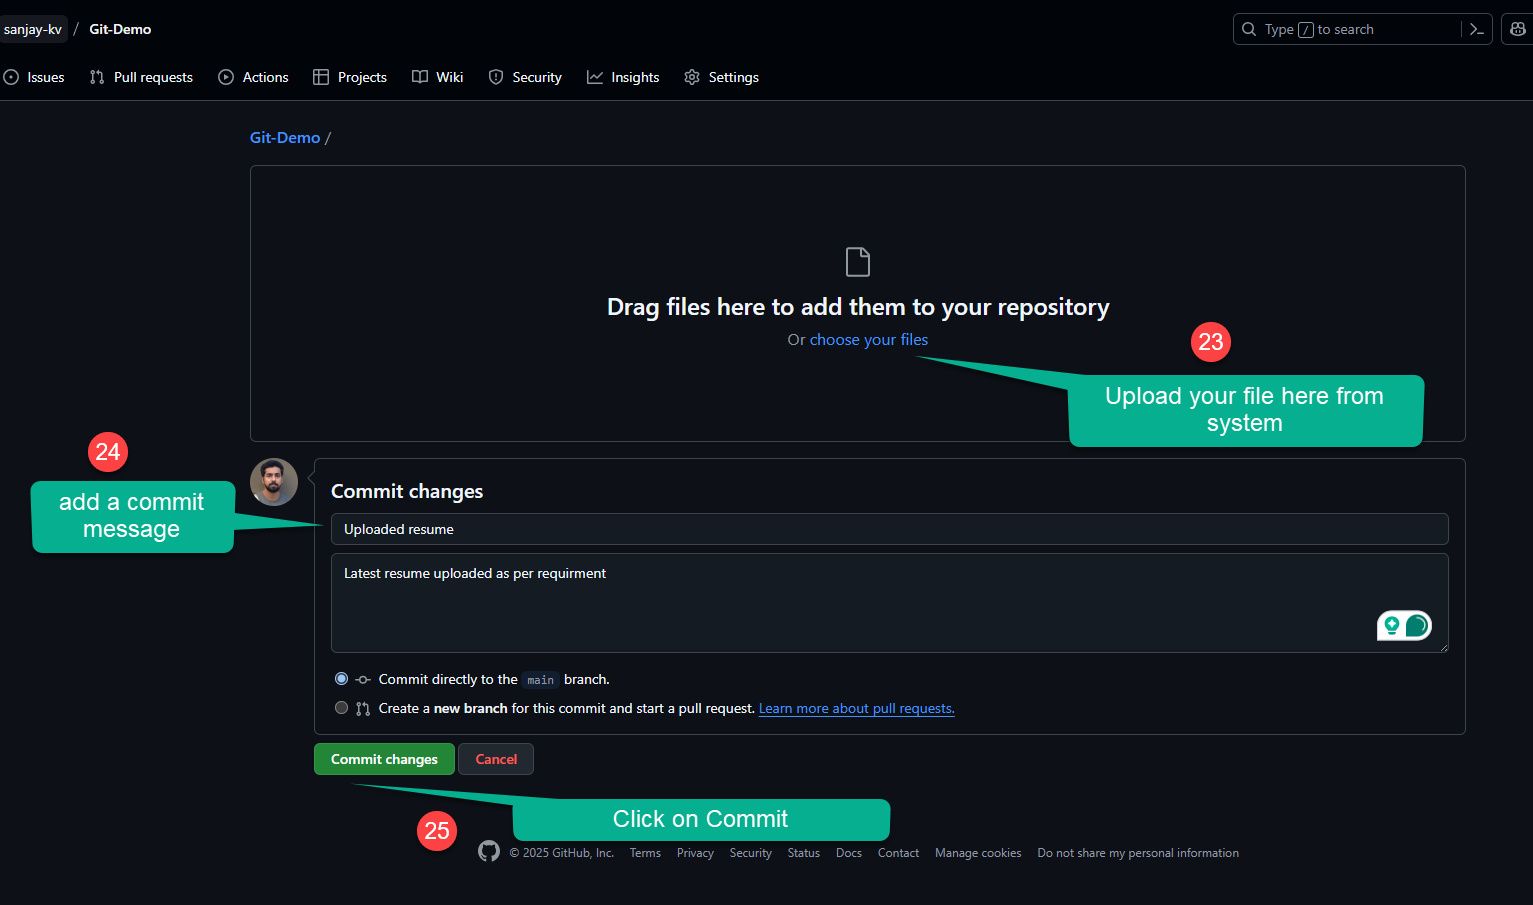
You will now be able to see the uploaded resume in your repository.
Watch the video Tutorial
Conclusion
In this tutorial, you learned about the syntax and structure of HTML. HTML syntax consists of elements, tags and attributes that define the structure and content of a web page. A HTML document follows a basic structure with elements like <!DOCTYPE html>, <html>, <head>, <title>, <meta> and <body>. Understanding HTML syntax and structure is essential for creating web pages and applications.